React Refs
In quite a few of my React apps, I’ve pulled images from some outside API to then be displayed on a page to users. It’s a fairly simple process, BUT there is almost always an issue when it comes to rendering the images; oftentimes the images that are returned are large and not uniformly formatted.

One solution that I found when trying to solve this issue is CSS Grid combined with React’s Ref .
First, let’s create a React component to render a list of images and use CSS Grid styling to allocate cells in that grid to the images that are returned.

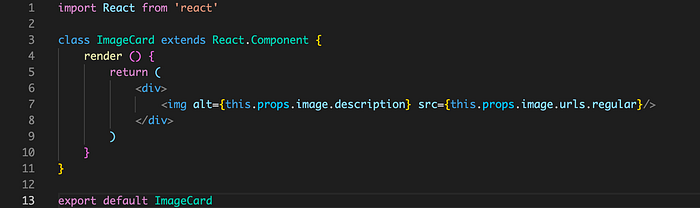
We can create an ImageList component, which is responsible for rendering all the images returned from the API. In particular, the ImageList component will return a <div> that will be formatted to return a grid system into which individual images will be placed.
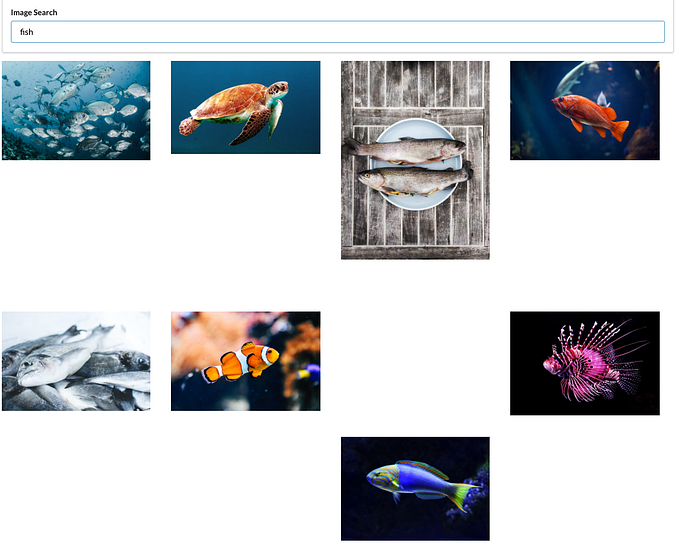
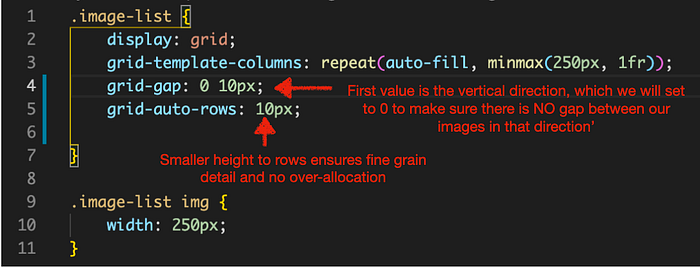
Now, notice there is an arrow pointing to a property called grid-auto-rows. Initially, when we use the CSS Grid system with our ImageList, we get back images that occupy all different amounts of space within the cells, or rows, of our grid. Some pictures are shorter than others, however, and therefore there will be chunks of white space displayed to the user (image below on left). We’d like to clean that up: enter grid-auto-rows, which essentially determines how tall each of the different grid cells are. This eliminates our white space problem, but creates another one: the longer images tend to get scrunched up (image below on right).

So one solution that I found super useful makes use of the clientHeight property of an image. However, this solution cannot be implemented using css alone.
If we inspect one of the images being scrunched up, we can add a custom style to it called grid-row-end and specify the span number appropriate to display the image correctly.


What span 2 means is: allocate TWO cells in the grid to this image instead of the default of one. If we had specified span 3, THREE cells would have been allocated to the image, and so on. Great, look how nice that image looks! However, you can immediately see a problem. If we specify a span number of 2 for each image, some images might still remain scrunched up, while others will have a chunk of white space…because each image is a different height. We absolutely cannot sift through all of our image results manually to give them their own specific span numbers.
So what we need to do is determine the height of an image and then based upon its height, we can determine how many cells it should be allocated, or in other words, the appropriate span number for that image.
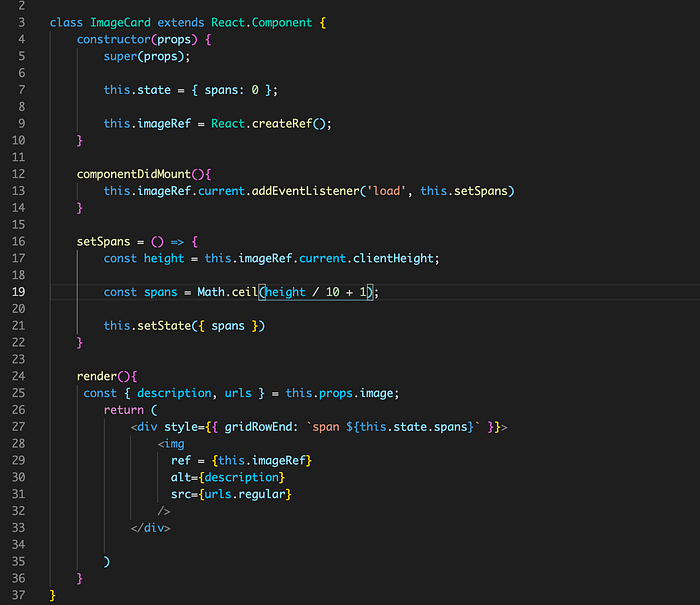
We will need to pull in the ever useful React component that we almost always use to render a single image at a time within our list of images: the Card. Once the image is rendered, our Card component will be responsible for determining how large the image is and then applying the appropriate span number to our grid-row-end property.
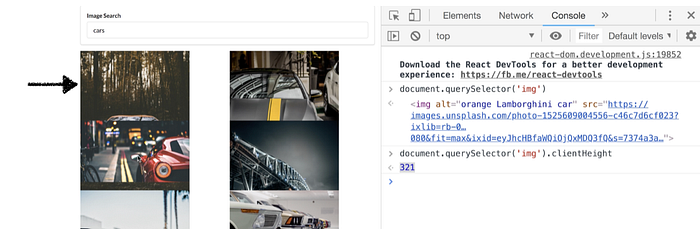
How do we figure out the height of an individual image, though? If we were using vanilla JavaScript, we might use something like document.querySelector for reaching into the DOM to pull out information about specific elements. And then to get the actual height of the image, we can chain on the clientHeight method.
But when we want to access DOM elements directly using React we do not make use of document.querySelector. We will use the Ref system, short for reference.
The Ref system is capable of giving you direct access to a single DOM element that is rendered by a component. In order to create a Ref we define our constructor function, call a function inside the constructor to create a reference and assign it as an instance variable on our class. Once we assign that Ref as an instance variable on our class, we go to our render method and pass that Ref into some particular JSX element as a prop.
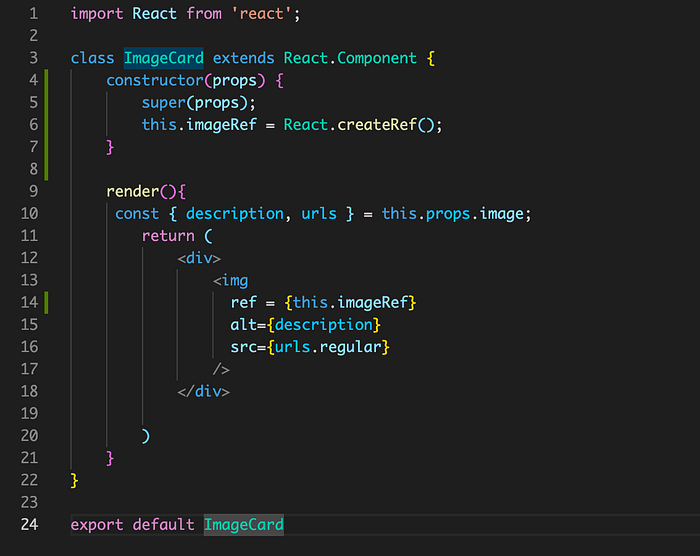
We can now reference this.imageRef anywhere within the component to get some information on the img DOM node.
One thing to keep in mind, though, is that the <img/>tag in our component is a JSX tag which will EVENTUALLY be turned into a DOM element but it is not currently one…so the Ref system is really the only good way of getting info on that element.
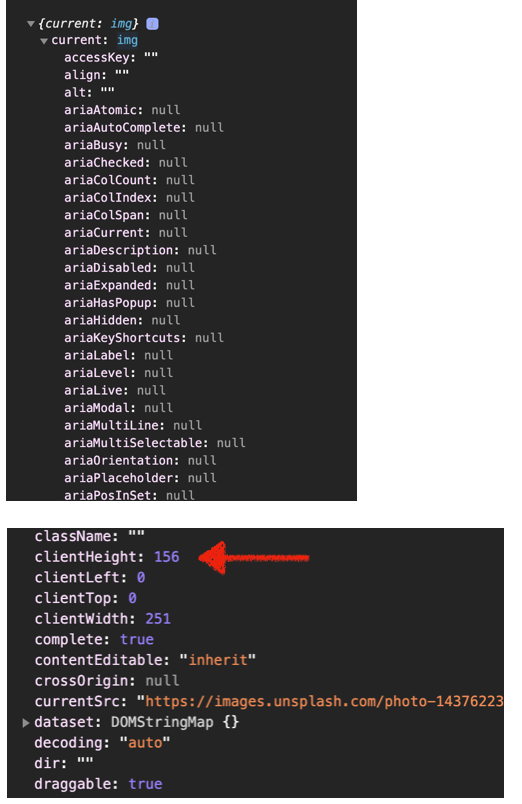
If we do a console.log of our imageRef in a componentDidMount() function, what we see is this:
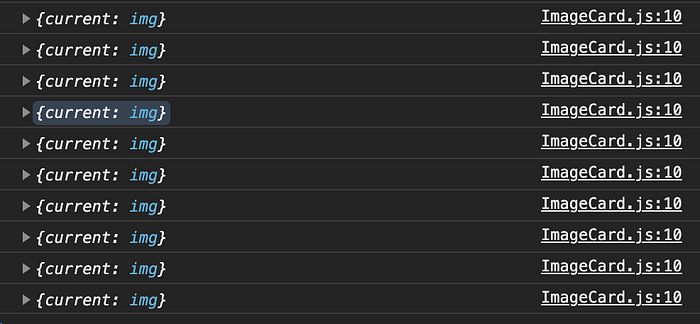
So the Ref itself is a Javascript object that has a property called “current”. And the “current” property references a DOM node, in this case our img. If we expand one of those “current” objects, we will find a variety of key/value pairs and one of those is that clientHeight that we accessed previously using document.querySelector.
Now, in order to make sure that our image is loaded before we look at its properties, we are going to reference this.image.current and then add a very basic Javascript event listener to it.
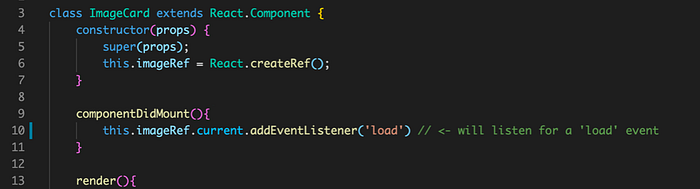
The code above is incomplete, though. The event listener actually takes TWO arguments, the event it is listening for (the ‘load’) and a callback function. We’ll call the callback function this.setSpans, since what we are attempting to set is the grid-row-end property, which operates based on span units.

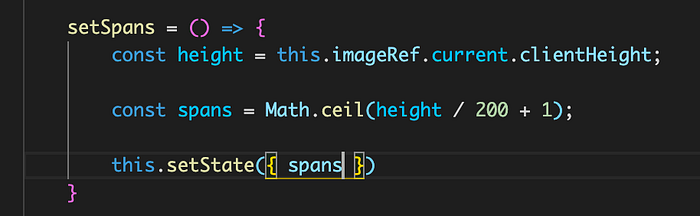
Remember that callback functions must be bound or the value of this is undefined, so we will define our function as an arrow function. Within that function, we are going to grab the height of our image and then divide it by the size of our grid cells (which we set in our CSS file using the property grid-auto-rows) in order to figure out how many spans (or grid cells) our image needs to occupy. We will add 1 to our grid cell height to make sure that if there is a portion of a row that the image needs, this will be rounded up, or go to the next highest row. To cap the spans value, we will use Math.ceil.
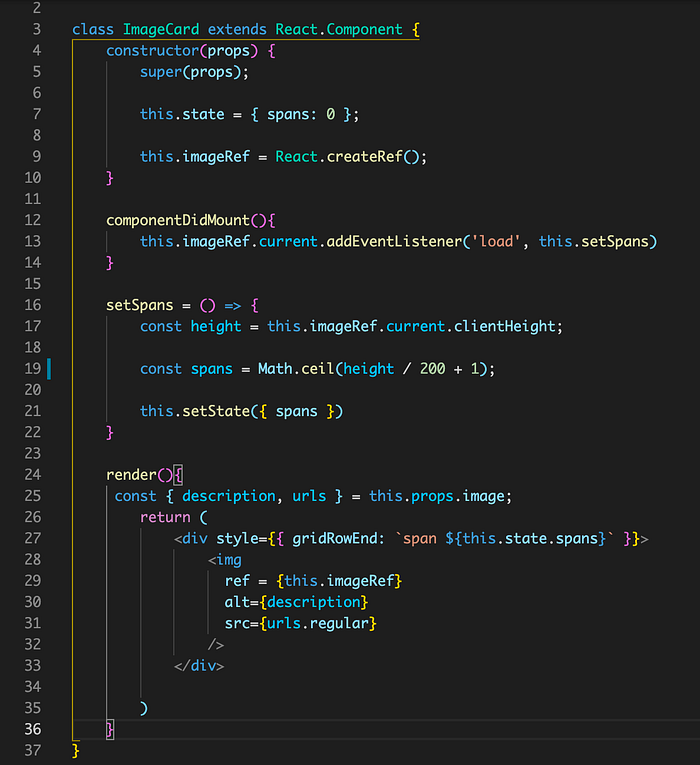
Once we calculate the spans, we will set it on our state, which we need to initialize in our constructor. And we will also need to assign that spans value to the div responsible for rendering the image.
If we run this code, we’ll see that there is no more scrunching!
However, we still have an issue. There is a ton of white space! How do we fix that? Well, we can use a smaller height for our rows, which will allow us to get more fine grain detail…so we can set our grid-auto-rows property to 10px. This will ensure that we don’t over-allocate rows to any individual image. The other small change we have to make is to our grid-gap property, which is responsible for all of that white space in between our images. We need to make sure that there is NO gap between our images in the vertical direction; we do this by setting the first value to ‘0’ (the grid-gap property can take 2 values, the vertical direction and the horizontal direction).
Since we changed our row height, we will have to change our setSpans function slightly in our ImageCard component. Below is our final code:
And when we run THAT code:
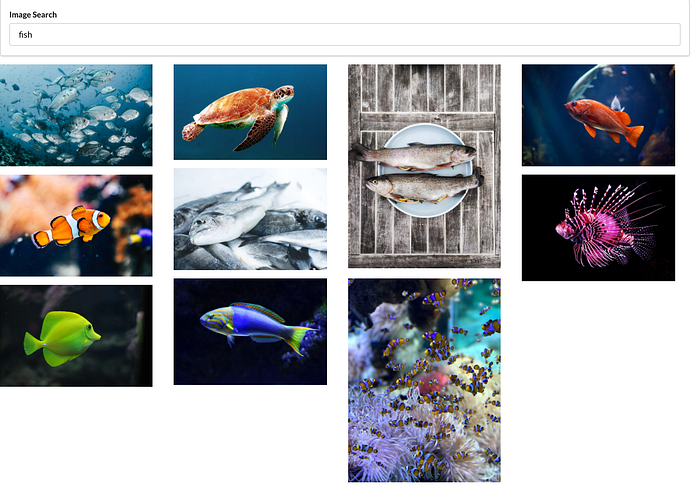
Voila! A list of images that is perfectly formatted according to original image size!